Introduction
Upgrading the Xbox One S with a 5TB Barracuda Drive is an exciting custom-order modification that allows for increased storage capacity. This blog will guide you through the process and highlight the challenges faced along the way. From partitioning the drive to troubleshooting hardware issues, you will gain valuable insights into the upgrade process. While the final outcome may not have met expectations, this experience serves as a valuable lesson in understanding the limitations of the Xbox One system. Let’s dive in and explore the journey of upgrading an Xbox One S with a 5TB Barracuda Drive.
Custom Order of a 5TB Barracuda Drive
A custom order of a 5TB Barracuda Drive for an Xbox One S offers an exciting upgrade for increased storage capacity. This custom-modification allows users to store more games, apps, and other data on their console. However, there are a few important considerations to keep in mind.
Firstly, it’s worth noting that the 5TB Barracuda Drive is slightly thicker than a regular drive. This is because it needs to accommodate the additional storage capacity within a compact size. While this shouldn’t pose any major issues, it’s important to ensure that the drive fits properly into the Xbox One S.
Additionally, due to the large size of the 5TB drive, it’s necessary to partition it specially for the 5TB capacity. This ensures that the Xbox One S recognizes and utilizes the full storage space effectively. Partitioning the drive correctly is crucial for optimal performance and to avoid any compatibility issues with the console.
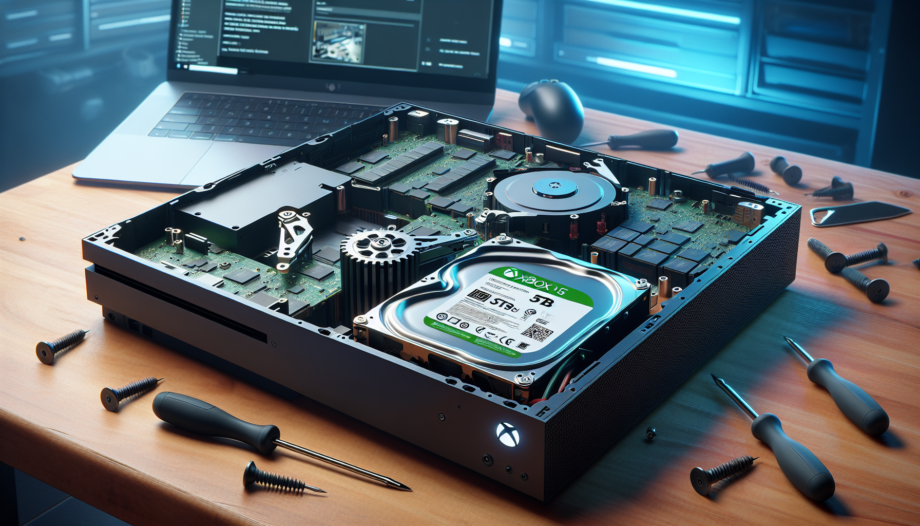
To give you a visual reference, here is a screenshot of the 5TB Barracuda Drive:

Installation Process
Installing a 5TB Barracuda Drive in an Xbox One S involves a few crucial steps. Let’s break down the installation process to ensure a successful upgrade:
Disassembling the Xbox One S
The first step is to disassemble the Xbox One S by removing the necessary screws. This will allow access to the internal components for the drive installation.
Checking the Status of the Device
Before proceeding with the installation, it’s important to check the status of the Xbox One S. This includes inspecting the fan and ensuring there are no hardware issues that could affect the installation process.
In the case of encountering a fan issue, it may be necessary to troubleshoot and resolve the problem before proceeding. A faulty fan can cause the Xbox One S to not power on properly.
Installing the 5TB Drive
Once the Xbox One S is disassembled and any hardware issues have been addressed, it’s time to install the 5TB Barracuda Drive. Ensure that the drive fits properly into the console and securely connect it.
After the physical installation, it’s necessary to partition the 5TB drive specifically for its capacity. This ensures that the Xbox One S recognizes and utilizes the full storage space effectively. Use a reliable partitioning tool like GParted to properly partition the drive.
However, it’s important to note that the Xbox One S has a hardware limitation that restricts the use of drives larger than 2TB. This means that even after successfully resizing the partition to 5TB, the system will downsize it and display an error. Unfortunately, this hardware lock cannot be bypassed.
Troubleshooting the Drive
While upgrading an Xbox One S with a 5TB Barracuda Drive can be an exciting project, it’s not without its challenges. In this section, we will discuss some common troubleshooting steps you may encounter during the drive installation process.
Encountering a system error at 58%: One possible issue you may face is the system getting stuck at 58% during the update process. This can be an indication of a faulty drive or a problem with the encryption between the drive and the motherboard.
Identifying a faulty drive: To determine if the drive is faulty, you can test it on another system. If the drive works on a different system, it’s likely that the issue lies with the Xbox One S itself. However, if the drive does not work on another system, it may need to be repaired or replaced.
Testing the drive on another system: Connecting the drive to another system can help determine if the issue is specific to the Xbox One S or if it’s a problem with the drive. If the drive works on another system, it’s possible that there is a hardware problem with the Xbox One S that needs to be addressed.
Determining the cause of the issue: If the drive works on a different system but still encounters errors on the Xbox One S, it’s important to investigate further. By checking the power pins and testing the components, like the MOSFET, you can identify any potential issues that may be causing the system to malfunction.
While it’s disappointing to discover that the Xbox One S has a hardware limitation that prevents the use of drives larger than 2TB, it’s important to remember that the troubleshooting process helps to identify and address any underlying issues. By utilizing tools like GParted for partitioning and conducting thorough testing, you can ensure that you have done everything possible to make the upgrade successful.
Identifying Power Issue
During the process of upgrading an Xbox One S with a 5TB Barracuda Drive, it’s possible to encounter power issues that can affect the functionality of the console. This section will discuss how to identify and resolve power-related problems.
Testing power pins on the Xbox
If the Xbox One S is not powering on properly, it’s important to test the power pins to determine if there is a power supply issue. Using a multimeter, check the voltage on each power pin to ensure they are within the expected range. Any significant discrepancies may indicate a problem.
Identifying a discrepancy in diode mode: Another method to identify a power issue is by checking the diode mode readings. By comparing the readings of different components, such as power pins, it’s possible to identify any inconsistencies that may be causing the power problem.
Tracing the issue to a faulty mosfet
If the power pins and diode mode readings appear to be normal, but the Xbox One S still fails to power on, the issue may lie with a faulty mosfet. The mosfet is responsible for regulating the power flow within the console. Testing the mosfet using a multimeter can help determine if it is functioning correctly.
Replacing the faulty mosfet: If the mosfet is indeed faulty, it will need to be replaced. This can be done by desoldering the faulty mosfet and soldering a new one in its place. It’s important to ensure that the replacement mosfet is compatible with the Xbox One S.
To provide visual reference, here is an image of the power pins and a faulty mosfet:
Finalizing the Upgrade
After encountering various challenges during the upgrade process of an Xbox One S with a 5TB Barracuda Drive, it’s time to finalize the upgrade and address the limitations of the system.
Reflashing the 5TB Drive
Before finalizing the upgrade, it’s important to reflash the 5TB drive to ensure that it is recognized properly by the Xbox One S. This step involves updating the firmware of the drive to the latest version to optimize its performance.
Resizing Partitions Using Advanced Partitioning Software
To make full use of the 5TB drive, advanced partitioning software like GParted is used to resize the partitions. By moving and resizing the partitions, the aim is to allocate the entire 5TB capacity to the games and apps partition.
Using GParted, the partitions are adjusted to utilize the unallocated space on the drive. This ensures that the Xbox One S recognizes and effectively utilizes the full storage capacity of the 5TB drive.
Here is an image of GParted in action:
Testing the Xbox with the Upgraded Drive
With the 5TB drive reflashed and the partitions resized, it’s time to test the Xbox One S with the upgraded drive. The console is powered on, and the system is checked to see if it recognizes the increased storage capacity.
Unfortunately, despite the successful resizing of the partitions, a hardware lock on drives larger than 2TB prevents the Xbox One S from utilizing the full 5TB capacity. The system downsizes the partition and displays an error message.
Encountering a Hardware Lock on Drives
The hardware lock on drives larger than 2TB is a limitation of the Xbox One S system. While the upgrade process involved using advanced tools and techniques to maximize the storage capacity, this limitation cannot be bypassed.
It’s important to note that this hardware lock is specific to the Xbox One S and does not apply to all gaming consoles. Other consoles may have different limitations or may be able to support larger drives.
Despite the disappointment of not being able to fully utilize the 5TB capacity, the upgrade process served as a valuable learning experience. The troubleshooting, reflashing, and partition resizing techniques used are still applicable for other storage upgrades.
Conclusion
Reflecting on the limitations of the Xbox system, the upgrade process of the Xbox One S with a 5TB Barracuda Drive proved to be a challenging endeavor. Despite encountering various obstacles, significant efforts were made to troubleshoot and address the issues that arose during the upgrade.
Unfortunately, the final outcome did not meet expectations due to a hardware lock on drives larger than 2TB in the Xbox One S system. This limitation prevents the console from utilizing the full 5TB capacity, downsizing the partition and displaying an error message.
However, it’s important to acknowledge the valuable lessons learned throughout this experience. From disassembling the Xbox One S to troubleshooting hardware issues, the process provided insights into the inner workings of the console and the complexities involved in upgrading its storage capacity.
Despite the disappointment of not fully utilizing the 5TB capacity, the customer’s Xbox One S will be returned with a 2TB drive instead. Although this may not have been the desired outcome, the efforts made during the upgrade process demonstrate a commitment to providing the best possible solution within the limitations of the system.
It’s worth noting that this hardware lock on drives larger than 2TB is specific to the Xbox One S and does not apply to all gaming consoles. Each console may have different limitations or capabilities when it comes to storage upgrades.
Overall, while the ultimate goal of maximizing the storage capacity of the Xbox One S was not fully achieved, the experience gained and the techniques utilized during the upgrade process are still valuable for future storage upgrades and troubleshooting scenarios.
Despite the limitations of the Xbox One S system, the efforts made during the upgrade process showcase a dedication to providing an optimal gaming experience for customers. The return of the Xbox One S with a 2TB drive ensures that the console can still provide ample storage for games, apps, and other data.
Video Link
Unfortunately, there is no video available for embedding. However, the transcript provides a detailed description of the process and challenges faced during the upgrade of an Xbox One S with a 5TB Barracuda Drive.